We always start with a clean surface. Typically that means we acid etch the concrete and clean it with a pressure washer. Whenever the concrete has been painted or sealed, we will use our diamond grinder with dustless vacuum to remove everything from the surface of the concrete. After the slab clean, it is ready to be sprayed with an overlay system.
First we apply a pattern. For our stained & sealed overlay system, most patterns are kept fairly simple. In this case it was 2’x2′ tiles on a 45 degree angle.

We spray the first coat of a concrete grout on the entire surface.


After the first coat has cured enough for us to walk on it (usually the same day), we apply a second coat of concrete grout. This time we turn the pressure down on our pump so that the material comes out it a heavier pattern. After we spray the surface, we run a trowel across it to flatten the high spots.


After we finish spraying the concrete, we remove the tape to reveal the pattern.

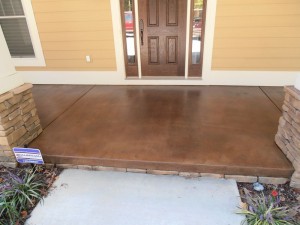
The next day, we return to apply our stain sealers. In this case, we applied a dark brown border to the porch & middle of the carport, and a lighter brown to the border of the carport.


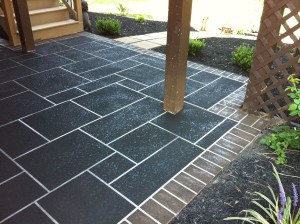
Here are a few photos of the completed job.